So far on PowerStack Engineering, we’ve covered the theory behind Dataverse plugins — including the plugin execution pipeline, synchronous vs asynchronous plugins, Pre-Image and Post-Image, plugin registration steps, and secure/unsecure configuration.
In this post, we’ll put everything into practice.
This is a complete, hands-on walkthrough that shows how a Dataverse plugin is built and executed end to end. We will:
- Create a plugin project from scratch
- Install the required NuGet packages
- Write real business validation logic
- Sign the plugin assembly
- Register the plugin and plugin step
- Verify the plugin executing inside Dataverse
By the end of this post, you’ll clearly understand how a plugin moves from
code → registration → execution in a real Dataverse environment.
Prerequisites
Before starting, make sure you already have:
- A Dataverse developer environment
- Plugin Registration Tool installed
(via PAC CLI or XrmToolBox – covered earlier) - Visual Studio (any recent version)
- Basic knowledge of C#
You do not need Dynamics 365 Sales or Customer Service apps installed.
A Dataverse environment is sufficient.
What We’ll Build (Real-World Scenario)
Business Requirement
Only company email addresses should be allowed on Contact records.
Validation Rules
- Trigger on Contact Update
- Validate only when Email Address is changed
- Allow only email addresses ending with
@company.com - Block the save operation if the rule is violated
This is a very common real-world validation scenario and a perfect use case for a synchronous Pre-Operation plugin.
Step 1: Create a Plugin Project
- Open Visual Studio
- Click Create a new project
- Select Class Library (.NET Framework)
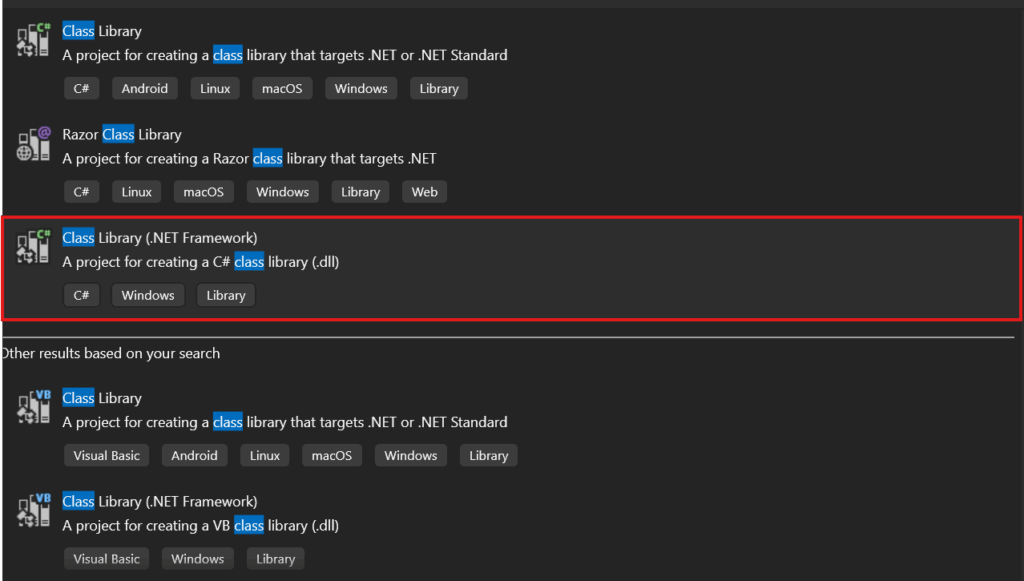
- Click Next
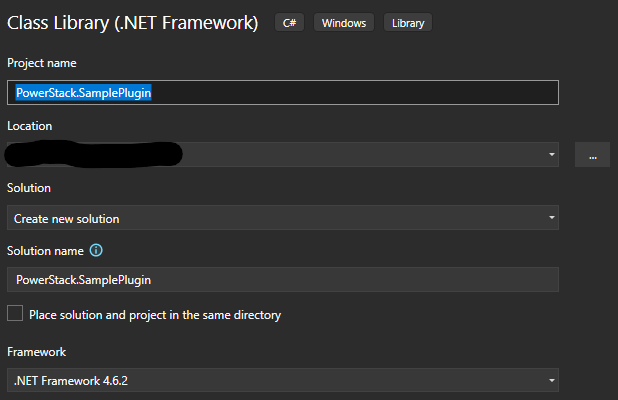
- Set:
Project name: PowerStack.SamplePlugin - Framework: .NET Framework 4.6.2
Step 2: Install Required NuGet Package
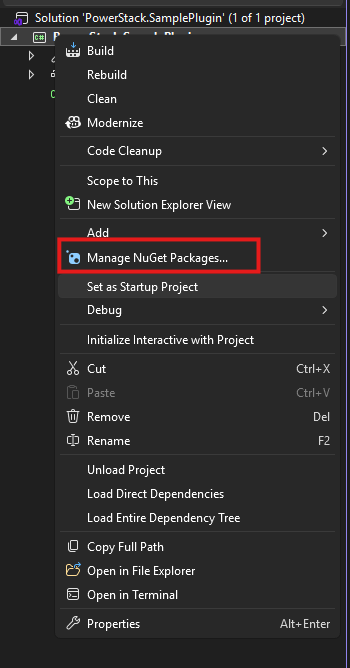
- Right-click the project → Manage NuGet Packages
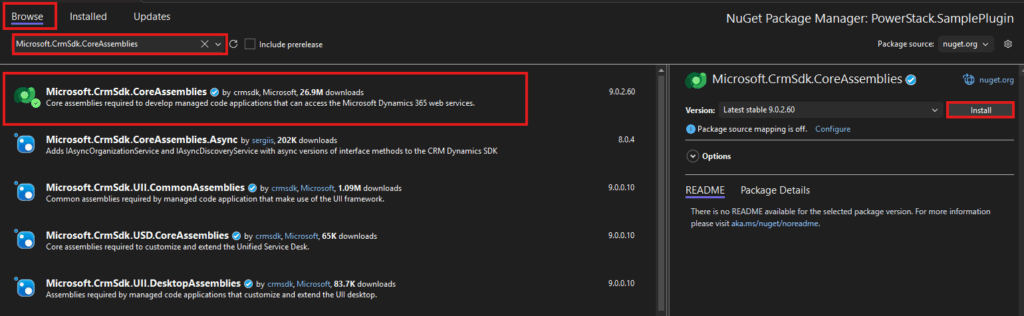
- Search for:
Microsoft.CrmSdk.CoreAssemblies- Install the package : This package provides all core interfaces required for plugin development.
Write the Plugin Code (With Real Logic)
Create a new class named:
ContactUpdatePluginPaste the following code:
using Microsoft.Xrm.Sdk;
using System;

namespace PowerStack.SamplePlugin
{
    public class ContactUpdatePlugin : IPlugin
    {
        private readonly string _unsecureConfig;
        private readonly string _secureConfig;

        public ContactUpdatePlugin(string unsecureConfig, string secureConfig)
        {
            _unsecureConfig = unsecureConfig;
            _secureConfig = secureConfig;
        }

        public void Execute(IServiceProvider serviceProvider)
        {
            var context = (IPluginExecutionContext)
                serviceProvider.GetService(typeof(IPluginExecutionContext));

            var tracingService = (ITracingService)
                serviceProvider.GetService(typeof(ITracingService));

            tracingService.Trace("ContactUpdatePlugin execution started.");

            if (!context.InputParameters.Contains("Target") ||
                !(context.InputParameters["Target"] is Entity target))
            {
                tracingService.Trace("Target entity not found.");
                return;
            }

            if (target.LogicalName != "contact")
            {
                tracingService.Trace("Plugin executed on wrong entity.");
                return;
            }

            // Validate only when email is updated
            if (!target.Attributes.Contains("emailaddress1"))
            {
                tracingService.Trace("Email not updated. Skipping validation.");
                return;
            }

            var email = target.GetAttributeValue<string>("emailaddress1");

            if (string.IsNullOrWhiteSpace(email))
            {
                tracingService.Trace("Email is empty. Skipping validation.");
                return;
            }

            // Business rule
            if (!email.EndsWith("@company.com", StringComparison.OrdinalIgnoreCase))
            {
                tracingService.Trace("Invalid email domain detected.");

                throw new InvalidPluginExecutionException(
                    "Only company email addresses (@company.com) are allowed."
                );
            }

            tracingService.Trace("Email validation passed.");
        }
    }
}
Why This Logic Is Implemented This Way
This plugin is intentionally designed to demonstrate correct plugin architecture:
- Synchronous execution → required to block the save operation
- Pre-Operation stage → validation occurs before data is committed
- Filtering Attributes → plugin executes only when email is updated
- Exception-based validation → prevents invalid data from entering Dataverse
This is exactly how business-critical validations should be implemented in real projects.
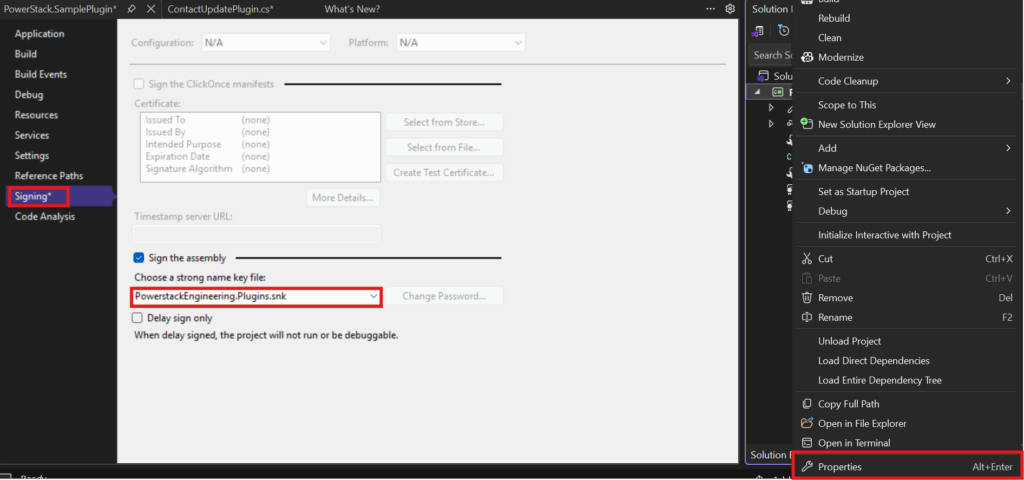
Step 4: Sign the Plugin Assembly (Important)
- Right-click the project → Properties
- Go to the Signing tab
- Check Sign the assembly
- Create a new strong name key file
- Save
Step 5: Build the Project
- Build the solution
- Ensure the build succeeds without errors
- Note the location of the generated DLL

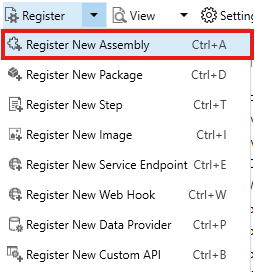
Step 6: Register the Plugin Assembly
- Open Plugin Registration Tool
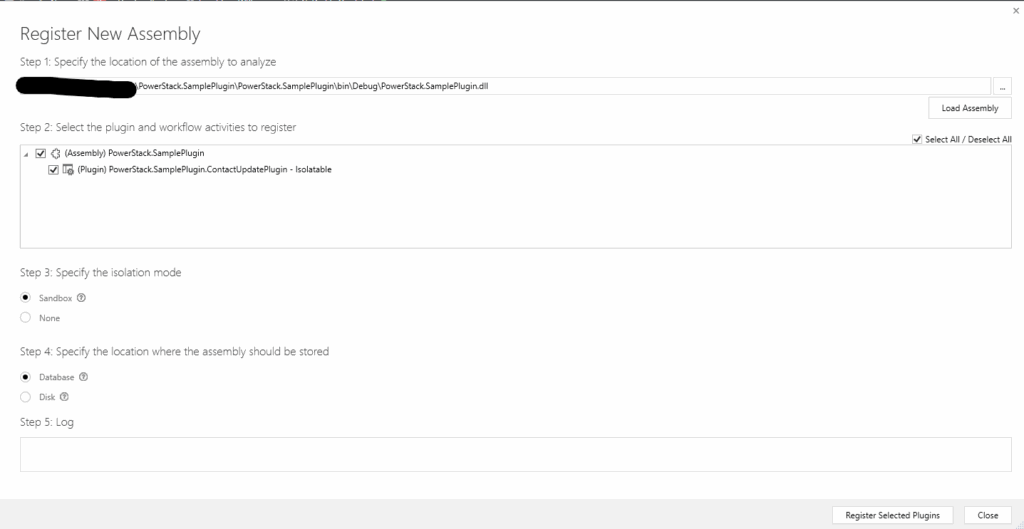
- Click Register → Register New Assembly
- Choose:
- Assembly location: Disk
- Select the compiled DLL
- Set:
- Isolation Mode: Sandbox
- Storage Location: Database
- Register the assembly
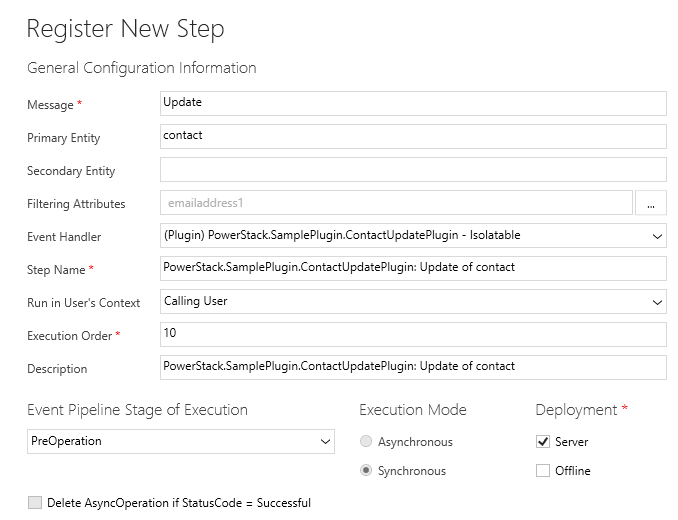
Step 7: Register the Plugin Step
Right-click the plugin class → Register New Step
Step Configuration
| Field | Value |
|---|---|
| Message | Update |
| Primary Entity | contact |
| Filtering Attributes | emailaddress1 |
| Stage | Pre-Operation |
| Execution Mode | Synchronous |
| Execution Order | 10 |
| Run in User Context | Calling User |
Click Register New Step.
Note: This validation could also be implemented in the Pre-Validation stage.
However, Pre-Operation is intentionally used here because field-level data
validation is typically performed inside the transaction to ensure predictable
execution and clean rollback behavior.
Verify the Plugin Execution
- Open a Contact record
- Update the email to:
test@gmail.com - Click Save
Expected Result
- Save is blocked
- Error message shown
- Data not committed
Now update email to:
user@company.com
Save succeeds
Your plugin is working exactly as intended.
Common Mistakes & Best Practices
- Registering the assembly but forgetting the step
- Using Async plugins for validation
- Missing filtering attributes on Update
- Choosing the wrong pipeline stage
- Not using tracing for diagnostics
Correct registration prevents most production plugin issues.
Plugin Registration – Interview Questions
If you’re preparing for a Dynamics 365 / Dataverse developer interview, or want to test your real-world understanding, try answering the questions below in the comments.
1️⃣ You have registered a plugin assembly, but your plugin never executes.
What are the first 3 things you would check before touching the code?
2️⃣ In this example, we used a Pre-Operation synchronous plugin for validation.
Would you ever choose Pre-Validation instead?
If yes, in what scenario and why?
3️⃣ An Update plugin is firing multiple times and causing performance issues.
What role do filtering attributes play here, and how would you fix this?
4️⃣ Can a single plugin class be registered for multiple messages or entities?
What are the pros and cons of doing this?
5️⃣ Why is it considered a bad practice to use asynchronous plugins for business validation?
What user experience issues can this cause?
6️⃣ Think about a real project you’ve worked on (or studied).
What is one plugin registration mistake that caused a bug, rollback issue, or unexpected behavior?
💬 Try answering one or more questions in the comments.
There are no “perfect answers” we’re more interested in how you reason about plugin design.
Conclusion
Registering a plugin correctly is just as important as writing the code.
A well-written plugin with a poorly configured step will:
- Not execute
- Execute unexpectedly
- Cause performance or data issues
Understanding how plugins move from code → registration → execution is what separates
working plugins from production-ready Dataverse solutions.